Two craft dies, three ways

Hi everyone, I put together a step by step tutorial for the Studio Calico blog with their Fairground card kit and add-ons. You'll notice in my kit gallery (Hey Girl Card; Let's Celebrate Card) that the particular combination of the Hey Girl and nested Diamond dies were a favorite for me.

I had used them with vellum, cardstock, wool felt and as a tool for dry embossing. Now, I have one more sample for you to use both together an a project. 

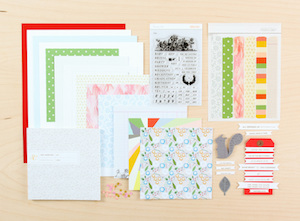
First up, I gathered my supplies (mostly) from Fairground kits with a particular color combo in mind: yellow, green, gold and white. 

Next, I die cut several diamond shapes from the Fairground card kit paper pad as well as my card sentiment with the "Hey Girl" die. The sentiment die was colored with a neon yellow ink dauber from Hero Arts but you could also dab it into your Color Theory ink pads to achieve the effect. 

My next step was it to arrange the diamond shapes on white card stock (size: 4.0 x 5.5 in). There are lot's of fun options here to vary the design. Once I settled for a diagonal arrangement, I glued the paper pieces down - a tiny amount of glue in the middle is sufficient to hold it down. 

When the glue was dry, I added a few of the gold stars from the card kit and sewed them down together with the paper diamonds. 

You could leave it there or add a strip of washi tape for a clear transition between the patterned paper and sentiment. In my last step, I adhered the sentiment with a glue pen and attached everything to a kraft card base (size 4.25 x 5.5 in). 

Thanks for joining me today. If you feel inspired to create your own card version of this die set combination, please link to it in the comments. I'd love to check out your ideas!


Bee Happy Shaker Card Tutorial

How was your Memorial Day/Whitsunday Weekend, friends? I'm still in the catching up mode (when am I not?) but also found some time to relax and create some paper projects. Speaking of paper goods and catching up... 

Well, as always, I had a lot of fun goodies in my April Studio Calico kit box just couldn't take the time to give everything the attention it deserved in time for the official Creative Team gallery. One of these items was the super cute Bee Happy stamp set by Katie Thierjung (I've meanwhile posted a second card with this punny bee stamp set). Another thing that I had still out on my desk was a Easter Gift Tag Stamp & Die set we had as a Cirque kit add on. I saw the two next to each other and found the hexagon tag die would be perfect with the Bee Happy stamps... and it resulted in this fun shaker card above.  

I wrote my step by step process out for the Studio Calico blog a few weeks ago and finally found the time to post it on here, too, should you want to create something similar:

Step 1 - Cut a white cardstock mat a bit smaller than your card base and die cut the hexagon tag from it.

Step 2 - Use the same hexagon die on a full sheet of foam adhesive. 

Step 3 - Trace the hexagon from your mat onto the card base with a pencil.

Step 4 - On the card base, mask the edge where the mat would end and stamp over the pencil lines with your hexagon stamps from Bee Happy. 

Step 5 - Erase the pencil lines so that only a faint line is visible to you. Remove the bottom protective layer of the die cut foam adhesive frame and stick it down on the card base along the pencil lines. Fill your frame with glitter and sequins. 

Step 6 - Peel off the upper layer of the foam adhesive frame and add a piece of clear transparency to seal the window.

Step 7 - Stamp your mat with the bee and flight trail image in black ink and sprinkle it with Mister Huey mists. 

Step 8 - Stamp your sentiment in CT Flamingo ink on the left over cardstock hexagon tag. You can also fill the letters with coordinating watercolor paint. Add a twine bow through your tag and adhere it to the other hexagon tag you had cut from foam adhesive earlier to make the frame. 

Step 9 - Adhere the cardstock tag to your mat, then pop up the mat with more foam adhesive and place it over the shaker window.

Step 10 - Decorate the envelope with the hexagon stamp pattern and bee image. Slip your card into the envelope. Add a return address to the labels masking tape and seal the envelope with it. 

Step 11 - Mail your card off and make someones day :)

Hope you liked this quick step-by-step shaker card tutorial. If you have any questions, just leave me a comment and I'll be happy to answer them. 


Letterpressing without Printing Plates

I've been lazy getting the letterpress supplies out lately although I very much enjoy the process and beautiful texture it gives. When I received my box of Studio Calico goodies this month, however, I found a piece of laser cut faux leather in the embellishment kit "Iris" and just had to give printing with it a try. 

Yes, you hear me right! You can totally do letter pressing without the regular plastic printing plates. You just need to experiment a little with additional shims and thickness of the letterpress/cotton paper. 

What you need is a manual die-cutting machine, the letterpress bundle, letterpress ink, a way to temporarily adhere the faux printing plate to the letterpress platform and, well, your printing plate alternative (supplies are linked below).

If you're not sure your printing plate alternative will work, you can try blind impressing first, i.e. you run the process without ink. That way you'll see if things need tweaking without getting unneccesarily messy.

The faux leather piece I used has two different sides. One is very soft and sued-y and I put the temporary adhesive on this side (I could rub it all off afterwards) and put it directly down on the printing platform, then inked the textured leathery side with teal blue letterpress ink.

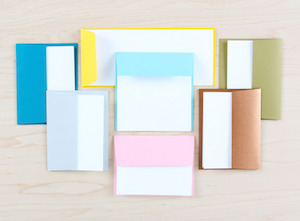
Here's what it looked like straight out of the Cuttlebug on the first try with ink. So pretty - imagine this done with gold ink...! The card I made with the print came together super quick especially with the new Card Bases add-on with its pre-cut and fold card bases and matching colored envelopes. I found a diamond design similar to the print in a kraft die-cuts pack (also in the embellishments kit) and the gold foil sentiment from the card kit kind of was a perfect match to top it all off.

I hope you enjoyed this mini tutorial today and have a lovely Sunday! 


Supplies: